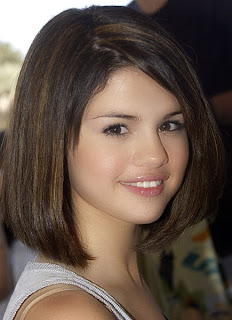
Before |
After |
- First open your image and duplicate the background layer by pressing Ctrl+J or drag n drop the background layer over the new layer icon. Now set the blending mode of this new layer to "Vivid Light".
- Now lets invert this layer by pressing Ctrl+I or go to Image > Adjustments > Invert.
- Then apply Gaussian Blur by going to Filters > Blur > Gaussian Blur. Apply the blur effect by increasing the radius till u get to see the face looking sharper as shown in the image below.
- We are almost done now lets move on to smooth the skin. Go to Filters > Others > High Pass. Move the radius slider until you get the desired smooth skin and don worry about the wired effect over the eyes u just increase the radius till u get the desired smooth skin & click ok.
- Now create new mask for the background copy layer and fill it with black by going to Edit > Fill options & now it will hide the image. Now switch colors to white and select the mask and start drawing over the cheeks, forehead, chin, Nose and other parts of the skin alone. Don draw over eyes n lips.
- Then if u feel the effect was too shiny you can correct it by reducing the opacity of the layer.
- Thats all you are done.
Hi Friends,
This is my first ever tutorial for this blog hope u all like it and please leave ur valuable comments. Also leave ur suggestions about the post i will correct it in my upcoming posts.
Thanking You.
Regards
Anbu
anbu.ame@gmail.com


Really amazing dude .Beginning itself its rocking dude.:D:D:D
ReplyDeleteNice work da anbu...
ReplyDelete